PLEASE NOTE MOST OF THIS IS FROM 2015 and the photos are pants! I am going to redo the technique and update with a new video and walk through showing how to apply shadows for a 3D effect.
We have updated the technique and Emma did a YouTube video in 2017 : https://www.youtube.com/watch?v=v3wE_FQ1ycs
If you found inspiration from our technique or video please don't forget to credit or mention Inkylicious.
2015: Apologies to all who have been waiting for this ....
A quick walk through on creating the parchment effect as shown on our TV show.
Whether you have purchased one of our 'Winter Bauble Kits' or the goodies separately here's how to create them.
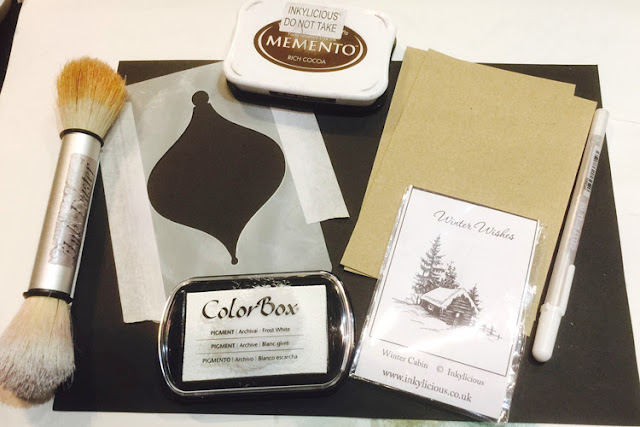
What I've used:
Inkylicious Winter Cabin or Winter Lodge stamp
Bauble Stencil (or shaped stencil that can fit your stamp inside)
We now use: Brilliance White Ink Pad
Ink Duster or blending brush
Sakura White Pen (this is water based so we can blend the colour out)
Memento Rich Cocoa (for stamping the image)
Low Tack Stencil Tape (to hold the stencil down)
Quickie Glue Pen (great for detailed glittering)
Inkylicious Iridescent Glitterz (for added sparkle)
Medium Waterbrush or paintbrush)
In the 'Winter Cabin Bauble Kit' :
A6 Bauble Stencil
Winter Cabin Stamp
Dew Drop White Ink Pad
Sakura White Pen
Fluffy Puffy Stuff
5 Sheets A5 Stamping Kraft Card
In the 'Winter Lodge Bauble Kit' :
6" Bauble Stencil
Winter Lodge Stamp
Brilliance White Ink Pad
Sakura White Pen
Sakura Stardust Clear Pen
Quickie Glue Pen
Inkylicious Iridescent Glitterz
5 Sheets A4 Stamping Kraft Card
So here's the products I'm using
Step 1:
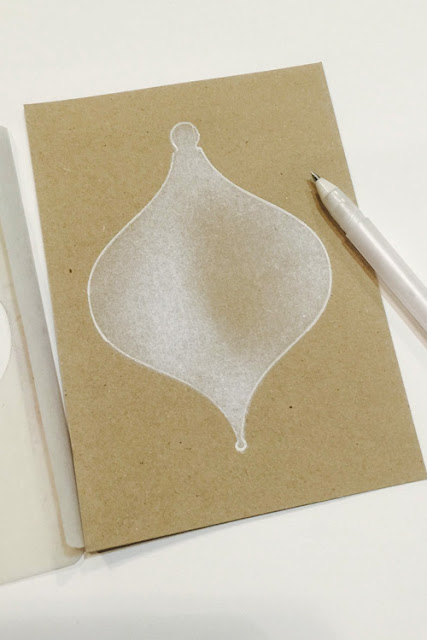
Using Low Tack Tape, tape the stencil on to the Stamping Kraft Card, Hint: I wrap the tape under one side as a hinge so I can lift the other side and check the depth of colour.
Apply the ink around the edges of the stencil on to the Kraft Card - remember the Brilliance white ink is very thick and opaque so you only need a little ! Lift the stencil on the unhinged side if you wish to check the depth.
Step 2:
With the stencil still in place use the Sakura White Pen to draw an outline around the inner of the stencil. Hint: To quickly get the ink flowing to the nib - hold the pen with the nib at the bottom and flick the pen like a thermometer.
You can lift the stencil on the unhinged side if you need to check the line to see if you have missed any.
Step 3:
Line completed - ready for stamping.
Step 4:
Now you can, if you wish, stamp the image with the Brilliance White Ink Pad (I'll show you that in the gallery this weekend) whatever you do - don't stamp in a Black ink - you are trying to create a nice parchment effect and black is way too harsh ... we like to use the Memento Rich Cocoa so we can then add white highlights with the Sakura Pen.
Step 5:
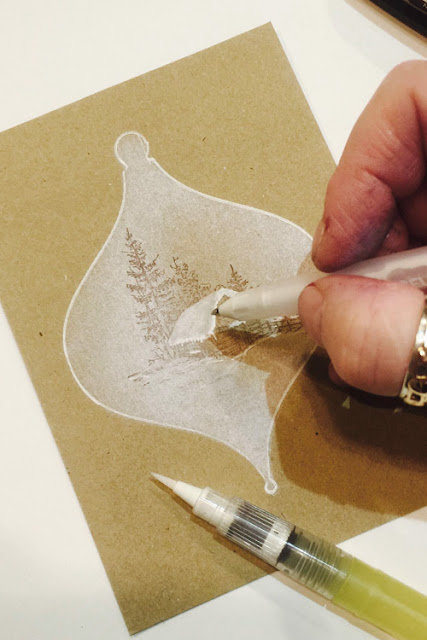
Using the Sakura white pen, colour the parts of the image where snow may naturally lay such as the fence, branches and yes the roof! Use the white pen to scribble a heavy line of white around the lower edge of the roof, then using a waterbrush (paint brush and water if not) blend the white line out to the top of the roof, blast with a heat gun to quickly dry. Add more white around the edge of the roof for more definition.
Almost Finished .... So here's mine coloured in with the Sakura White Pen. Did you remember to colour the chimney pot and add some white smoke? I've also added snowfall dots.
Time for some Sparkle !
Use a quickie glue pen and glitter to add some sparkle.
So this is just a very quickie walk through for you. I'll get a video done this weekend and also a gallery of lots of different ones using same baubles but different stamps, same stamps but other stencil shapes and I'll also show you how to tint the white to give even more effects.
These two below are from 2021.


